Top Trends for 2025: Best DIY Kitchen Backsplash Styles to Try Now
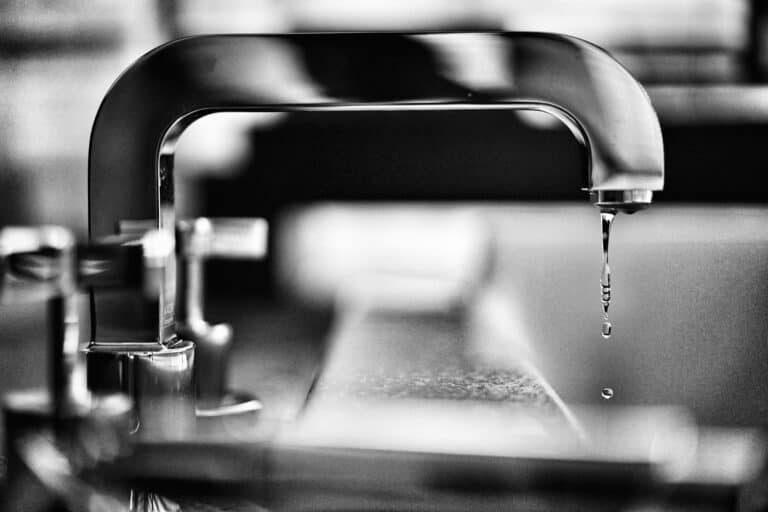
Ever you wondered why some kitchens look modern while others seem really old-fashioned? It often comes down to a simple detail many overlook. Check out our kitchen backsplash ideas
I’m excited to share the latest kitchen backsplash trends 2025 that are changing American homes! Through countless projects and conversations with families, I’ve found this year brings exciting updates.
Now, we’re seeing a mix of function and style in backsplash designs. The best tiles for kitchen backsplash make it easy for anyone to create amazing looks. Homeowners want both beautiful kitchens and functional kitchens.
Whether you’re new to DIY or have done a ton of DIY projects before, these backsplash ideas have something for everyone. Let me show you the most popular styles that are making kitchens beautiful across America!
Related Posts
Home Remodeling Mistakes Couples Should Avoid: A Guide
Maximizing Profits by Renovating a Rental Property Smartly
Why 2025 is the Perfect Year for DIY Kitchen Backsplash Projects
2025 is an exciting time for DIY backsplash projects. The home improvement world has changed a lot. Now, installing a backsplash is much easier.
New materials are making a big difference. They’re designed for homeowners, not just pros. You can find adhesives, tools, and systems that make the job simpler.
I helped a neighbor do her backsplash in one weekend. It used to take weeks and lots of frustration. Now, it’s much faster and easier.

The choices for DIY backsplash ideas are amazing. You can pick from many styles, like subway tiles or natural stone. And you know what? These materials are high-quality and look great.
Doing it yourself also saves money. Professional installation can cost a lot. But, doing it yourself can save 60-70% of the cost.
What really excites me is the tools and resources available. YouTube has great tutorials, and online communities offer help. Plus, manufacturers provide guides that are easy to follow.
Many families have remodeled their kitchens this year. It’s fun to see how proud they are of the work they put into them. The sense of accomplishment is cool to watch.
Now is as good a time as to get to work on your kitchen. More people are digging in to improve their homes, and kitchens are of course, where families spend the most time. Your home improvement backsplash project is about creating memories.
I’m really excited about DIY projects in 2025. The tools and materials are better than ever. And the results? They’re amazing.
Peel and Stick Backsplash: The Ultimate Beginner-Friendly Trend
I’ve seen many homeowners change their kitchens with peel and stick backsplash and it’s amazing. What was once my biggest doubt is now my top pick for beginners. The quality has improved so much!
These aren’t like the old contact paper. Today’s stick-on kitchen backsplash looks real to everyone. I have a sister whose kitchen looks like she installed “expensive tile work” when it was just $50. It’s great because it makes starting easy.
No need for grout or special tools. Just clean your wall and stick it on. If you make a mistake, most tiles can be peeled back and fixed. It’s like getting a do-over!

Top Peel and Stick Materials for 2025
The materials available now are amazing. I’ve tried many and these are the best:
- Stone-look vinyl tiles – Look and feel like real marble and travertine
- Subway tile designs – Classic white and colors with real grout lines
- Metallic finishes – Adds a touch of class with brushed steel and copper
- Glass-effect panels – Shiny surfaces that reflect light well
- Wood-grain patterns – Great for farmhouse and rustic kitchens
The diy backsplash with adhesive tile has grown. You can find hexagons, arabesque shapes, and big panels. The glue is much better now, so no more peeling corners!
Professional Installation Tips for Lasting Results
Start with a clean wall. Use degreasing cleaner and let it dry. Grease or moisture can ruin the glue.
Make sure your first row is level. Use a level tool, not your eye. This row is key for everything above.
Work in small parts and press hard. Use a plastic tool to get rid of air bubbles. Keep the pressure even.
For corners and outlets, measure twice and cut once. A sharp knife works well for most materials. Remember, you can’t add back what you cut off.
The results are impressive. Your stick-on kitchen backsplash will look like a pro did it. Friends will be impressed, and you’ll feel ready for more projects!
Modern Glass Tile Designs Dominating Kitchen Walls
The glass tile is super sleek and changing kitchen remodels. It’s very popular this year, and I love it! Glass tiles reflect light beautifully, making kitchens glow.
Glass tiles will work for any kitchen size. They make small kitchens look bigger and brighter. It’s like a secret trick for making spaces feel larger.
Installing glass tiles might seem hard, but it’s doable. Use a good adhesive for glass and take your time. The end result is worth the effort.

Frosted vs. Clear Glass Applications
Choosing between frosted and clear glass tiles is key. Both have unique charms. I’ve worked with both, and they each add something special to kitchen walls.
Frosted glass is great for families. It hides marks and spots well, making it easy to clean. It also creates a soft, calming light.
Clear glass tiles, on the other hand, enhance wall colors. They reflect light well, giving a crisp, modern look.
| Glass Type | Best For | Maintenance Level | Light Effect |
|---|---|---|---|
| Frosted Glass | Busy kitchens, families with kids | Low maintenance | Soft, diffused glow |
| Clear Glass | Modern minimalist spaces | Regular cleaning needed | Maximum light reflection |
| Textured Glass | Traditional or transitional styles | Medium maintenance | Interesting shadow play |
| Colored Glass | Statement walls, accent areas | Medium maintenance | Vibrant color enhancement |
Trending Color Combinations and Patterns
Current color trends are stunning. I’ve seen so many beautiful kitchen backsplashes. The hard part is choosing which one to use in my own kitchen.
Soft blues match so well with crisp whites and they yell coastal vibes. I saw a kitchen remodel where they used pale aqua and white subway tiles. The homeowner was so happy she cried!
Charcoal glass with metallic accents is also popular. Imagine gray tiles with gold or copper grout. It’s elegant and yet very modern and I love it.
Jewel tones are making a come back. The emerald greens, sapphire blues, and burgundy tiles are awesome focal points for your kitchen. They make the kitchen stand out above others.
Glass tiles don’t just cover your walls – they transform your entire kitchen’s atmosphere with light and color.
Pattern options are endless. Linear arrangements are clean and modern. Herringbone patterns add some fund curiousity without being overwhelming. Subway styles are still a favorite, but a variety of sizes and finishes are making subway tiles even more popular.
Best DIY Kitchen Backsplash: Subway Tile Reinvented
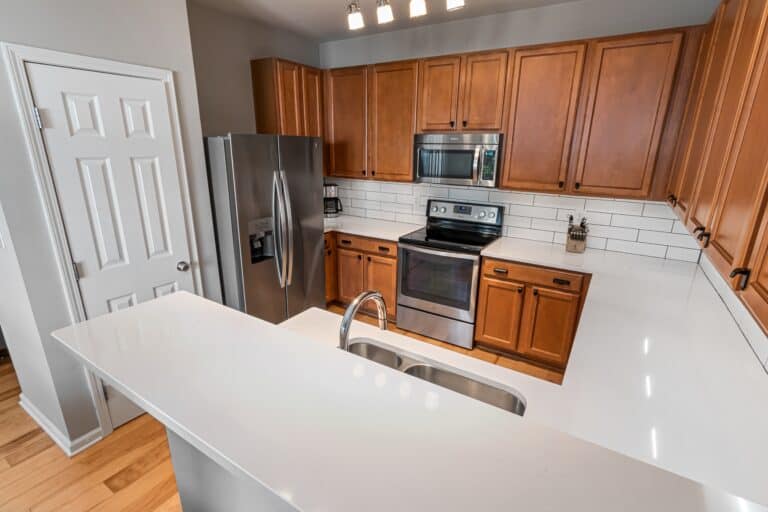
Subway tile is a top choice for a DIY kitchen backsplash because it’s stylish and easy to use. This classic tile has changed a lot, offering many ways to decorate your kitchen. It’s great because it’s easy to install and fits with many kitchen styles.
A diy subway tile backsplash is versatile and easy to put up. It’s perfect for beginners and DIYers with more experience as well. I’ve seen many kitchens get a new look with these tiles, and it always impresses me.
We recently did subway tile on a remodel we did in Michigan and it was spectacular! If I don’t say so myself. Ok, my husband did it all himself – but I always say we!

Contemporary Subway Tile Layouts
Subway tile is no longer just for horizontal patterns! The tile backsplash DIY world has come up with new ways to use these tiles. Vertical installations make kitchens look bigger and more open.
Here are my top subway tile patterns for 2025:
- Herringbone pattern – Creates sophisticated movement and visual interest
- Vertical stack – Makes ceilings appear taller and adds modern flair
- Mixed sizes – Combines different subway tile dimensions for unique texture
- Diagonal installation – Adds dynamic energy to traditional spaces
- Offset patterns – Varies the traditional brick layout for subtle sophistication
I love the herringbone pattern for its wow factor. It’s a bit more work to plan, but it’s worth it for the look.
Grout Color Trends for Maximum Visual Impact
The grout color can change your diy subway tile backsplash from simple to stunning. We’ve tried a lot of grout colors, and it’s amazing how it changes the feel of the kitchen.
Although, not always a fan, sometimes contrasting grout colors make the tile stand out. Black grout with white tiles is very popular for a dramatic look. It’s great for modern and industrial kitchens as well.
Matching and neutral grout colors always make the tiles blend together nicely. White grout with white tiles is always clean and who doesn’t love bright with tile. Soft gray grout adds a subtle touch without harsh contrast. It’s perfect for traditional and transitional kitchens.
The right grout color can make your subway tile installation look either custom and expensive or basic and builder-grade.
In 2025, colored grouts are all the rage! I’m loving sage green grout with white tiles for a spa-like feel. Navy blue grout adds a more sophisticated touch. These bold colors are great if you want your backsplash to pop.
Natural Stone Backsplash Ideas on a Budget
At first I thought natural stone backsplashes were too expensive. But, I found ways to make them affordable. You can get that beautiful stone look without spending a lot of money. We’ve helped many homeowners geet beautiful results on a budget.
Choosing the right materials and also knowing how to install them is important. We’ve had many fails, but with the right know how, you can get that luxurious look for less. Here is how you can make your dreams come true in your kitchen.

Affordable Stone-Look Alternatives
Stone-look alternatives are amazing today. Porcelain tiles that look like marble, travertine, and slate look so real. They look like natural stone but are sometimes more durable and easier to care for.
These materials can also be easier to work with. You don’t need any sealers, and they’re not damaged by food that splashes on them. They’re also not as heavy, so installation is easier.
If you want real stone, look for remnant pieces from countertop fabricators. These leftovers are perfect for backsplashes and are much cheaper. Smaller format natural stone tiles are another budget-friendly backsplash option that’s affordable yet beautiful.
DIY Installation and Sealing Techniques
Installing yourself can save a lot of money. The first step is proper wall preparation. It is important that a stone and stone-look diy backslpash has a solid and clean surface. Find a high-quality tile adhesive that can handle the weight of your tile.
Go slow and steady with the layout. Consider Dry-fitting everything first and mark where each tile goes with a pencil. This will help to prevent mistakes and will almost guarantee a professional look. For natural stone, you’ll want to seal it before and after you install it.
Sealing is quite simple: just apply the sealer with a cloth, let it soak in, then buff off any extra sealer. Most sealers are incredibly user friendly. Seeing that beautiful stone texture on your kitchen wall, knowing you did it yourself for less, is incredibly rewarding!
Farmhouse Kitchen Backsplash Styles Making a Comeback
Something magical is happening in kitchen design with farmhouse kitchen backsplash styles making a big comeback. Nathan has built so many awesome spaces for couples and families, and the results are amazing! These backsplashes add warmth and character, making the kitchen the heart of the home.
I love how timeless these kitchens are. We’re seeing natural wood tones, weathered finishes, and soft colors like sage green (which is Nathan’s favorite for cabinets) and warm gray.

Shiplap and Reclaimed Wood-Look Options
The shiplap trend has grown beyond just white boards. Families are now choosing reclaimed wood-look tiles for that weathered look without the real wood’s challenges.
These rustic backsplash diy options are great because they’re easy to install and maintain. Mixing different plank widths or finishes adds texture and interest. I always love having painted and natural finishes in my.
These materials are super durable and easy to take care of. They have the charm and feel of real wood without the hassle. The wood-look tiles today are very realistic, with natural looking grain patterns.
Rustic Color Schemes and Textures
The colors in farmhouse design now are stunning. We’re seeing creamy whites with natural wood, or soft blues with weathered gray. These combinations make kitchens feel both timeless and fresh.
Many families want that perfect farmhouse kitchen backsplash look. And the texture is a big part of that. Mixing smooth finishes with rough textures adds something amazing without being overwhelming. This really makes the kitchen feel cozy and loved.
Grays are getting more and more popular, especially with white cabinets. This mixes well with the farmhouse look that’s perfect for modern families. The trick is to balance rustic elements with clean lines to avoid clutter.
Metal Backsplash Trends: Industrial Meets Modern
Now, DIY fans can get cheap backsplash ideas that look expensive. Metal backsplashes can turn a kind of boring kitchen into a place everyone wants to hang out. And the best part is that their much cheaper than you think!
Metal backsplash reflects light nicely, making the kitchen look bigger and brighter. Metal backsplashes work well for both modern and industrial kitchens. The versatility really surprised me when I started trying different metals.

Metal backsplashes are also very durable. They handle heat, moisture, and daily use without getting worn out. Cleaning them is easy – just use a damp cloth!
Stainless Steel Sheet Applications
Stainless steel sheets are a top affordable kitchen makeover choice. They offer professional quality at a lower cost. Buying sheets instead of tiles saves a lot of money.
Installing them is easy with the right adhesive. Make sure your wall is smooth before applying. Use an adhesive made for metal for the best results.
Here’s why stainless steel sheets are great for DIY projects:
- Easy to cut to exact measurements
- No grout lines to clean or maintain
- Heat-resistant up to 1000°F
- Naturally antimicrobial surface
Copper and Brass Tile Installations
Copper and brass tiles are coming back in style! As you probabbly know copper develops a beautiful patina over time. It’s kind of like having living artwork on your kitchen wall.
Brass adds a touch of luxury without being too bold. These metals look great with both light and dark cabinets. I’ve seen amazing contrasts with white cabinets and brass tiles.
Here are some tips for installing copper and brass tiles:
- Use a metal-specific adhesive for secure bonding
- Plan your layout carefully – these tiles show fingerprints during installation
- Apply a protective coating if you want to prevent patina development
- Allow proper curing time before exposing to moisture
Metal backsplashes match almost every countertop. Whether you have granite, quartz, or butcher block (which we used in our last kitchen remodel), metal just adds that perfect industrial-modern look. It feels both today and yesterday.
Small Kitchen Backsplash Design Solutions
Working with small kitchens has taught me a lot. The right backsplash design for small kitchen spaces can make a big difference. I have seen other home owners share their tricks for making these areas feel bigger and more open.
Small kitchens are special to me. Each one has taught me how to blend style and function in a small space. These areas often become the most charming rooms in the home.

Space-Enhancing Material Choices
Light is key in small kitchens. They make the space feel larger by bouncing light around. You may want to start with whites, light grays, or soft pastels for a smaller area.
But light doesn’t mean dull! Just ask Candace Olsen. You can add interest with texture, pattern, or subtle colors. Glass tiles are great because they add depth and reflect light beautifully.
Large format tiles are a game-changer for small spaces. They have fewer grout lines, making the space look cleaner and larger. This also makes for an easy kitchen backsplash installation since you’re working with fewer pieces.
Natural stone alternatives and light-colored ceramic tiles can give your kitchen a high-end look without feeling too big. Choose materials that enhance your kitchen’s natural light.
Pattern Selection for Visual Expansion
Pattern placement can change how your small kitchen feels. Horizontal patterns make narrow kitchens feel wider. Vertical installations make low ceilings appear higher.
One of my favorite tricks is to extend the backsplash to the ceiling. This creates a beautiful, continuous look that makes the space feel more generous.
Subway tiles in different patterns can add interest without overwhelming small spaces. Try a herringbone or vertical stack pattern for a modern look.
Installing a backsplash in a small kitchen is often easier. It’s a great weekend project that can make a big difference. Plus, you’ll save on materials and get amazing results!
No Grout Backsplash Options for Easy Maintenance
I’ve found a game-changer for your kitchen cleaning – no grout backsplash solutions! No more scrubbing grout lines with a toothbrush. These designs are life-changing. They give your kitchen a sleek look and cut cleaning time in half.
These waterproof backsplashes aren’t just easy to clean. They also look amazing with their smooth surfaces. No more dirty grout lines or endless cleaning! Now, you have beautiful, easy-to-clean walls.

Large Format Tile Solutions
Large format tiles are leading the no grout backsplash revolution. I’m totally in love with the results! These 12×24 inch tiles or bigger cover a lot of wall space. Fewer grout lines mean less upkeep and a more elegant look.
For these tiles to work, you need to prep the walls. Your walls should be flat and level. But the effort is worth it! These tiles create a stunning look that makes your kitchen feel expensive.
Installation tip: Use good tile adhesive and work in small areas. Big tiles need the right support while they set. Take your time for the best results.
Seamless Sheet Material Applications
Sheet materials are where the magic happens for waterproof kitchen backsplash installations! Imagine large sheets of stone-look porcelain, stainless steel, or quartz covering your walls. These materials can almost eliminate grout lines.
I love watching my husband work with these materials because he makes installation look easy amazing. One sheet can cover the entire area behind your stove. Cleaning is a breeze! No more worries about grease in grout lines.
The installation process is different but simpler in a lot of ways. You’ll need special adhesives for large sheets, and measuring must be precise. Pro tip: Always get a bit more material than you think you’ll need. Nothing is worse than being needing one more inch of sheet metal.
These seamless metals are perfect for busy kitchens where easy cleaning is important for busy families. They also work great behind cooktops where splashing and heat can harm traditional grout.
Temporary Backsplash Solutions Perfect for Renters
The days of boring rental kitchens are over. Now, temporary backsplash for renters solutions are here. These let you make your kitchen look amazing without worrying about your deposit. Heck your landlord might even love it than the way it was before.
Today’s temporary solutions look just like the real thing. Your guests won’t even notice they’re removable. I had a friend that updated her kitchen, and her landlord loved it so much he asked where she got the backsplash.
The best part? You can take these materials with you when you move. Renters have reused the same backsplash in three different apartments. It’s like taking your home improvement with you!
Advanced Adhesive Systems That Actually Work
Modern removable adhesives have been a blessing for renters. They’re not the weak sticky strips from before. Today’s adhesives use micro-suction and are repositionable, creating strong bonds without damage.
I always suggest testing a small area first. But, I’ve never seen damage from quality temporary products. The adhesives stick well during daily use but come off cleanly.
- Micro-suction peel and stick tiles that work on most smooth surfaces
- Repositionable vinyl backsplashes with bubble-free application
- Magnetic systems for metal surfaces (perfect for some apartment walls)
- Static-cling options that require zero adhesive
The key is choosing products specifically designed for temporary installation rather than trying to make permanent materials removable.
Installation Without the Worry
Damage-free installation methods make these removable backsplash diy projects great for renters. No drilling, no permanent adhesives, and no changes to existing surfaces.
The process starts with preparing the surface properly. Start by cleaning the walls with degreasing cleaner and let them dry completely. This ensures maximum adhesion without damaging paint.
For peel and stick I recommend the “hinge method.” Apply the top edge first, then slowly work down while smoothing out bubbles. This prevents wrinkles and ensures even application.
Magnetic backsplashes work well if your rental has metal surfaces behind the drywall. Test with a strong magnet first! These materials often provide the cleanest removal from other temperary products.
When it’s time to move, removing them is just as important as installation. Use a hair dryer to warm particularly stubborn areas, and peel slowly at a 45-degree angle. Most quality temporary materials come off in full sheets, leaving no residue behind.
I love seeing renters gain confidence in personalizing their spaces. These temporary solutions prove that rental living doesn’t mean sacrificing style. Your kitchen can reflect your personality while keeping your landlord happy and your deposit safe!
Budget-Friendly Backsplash Projects Under $200
Transform your kitchen with cheap backsplash ideas that deliver maximum impact without breaking the bank. I’ve spent years perfecting the art of creating gorgeous backsplashes for under $200, and I’m thrilled to share these proven strategies with you!
The secret lies in knowing where to invest your money and where to save. You don’t need expensive materials to achieve a high-end look. Smart shopping and strategic planning can create stunning results that rival designer installations.
I’ve helped countless families achieve their dream kitchens on tight budgets. The satisfaction of completing an affordable kitchen makeover that looks like it cost thousands is absolutely incredible!
Most Cost-Effective Materials for 2025
Let me share the materials that consistently deliver the best bang for your buck. These options prove that budget-friendly doesn’t mean compromising on style or quality.
Ceramic subway tiles remain my top recommendation for budget-conscious homeowners. They’re classic, timeless, and incredibly affordable. You can find quality 3×6 subway tiles for as little as $0.50 per square foot during sales.
Peel and stick tiles have revolutionized the DIY market. Today’s versions look remarkably realistic and can fool even experienced contractors. I’ve seen stunning installations that cost under $100 for an entire backsplash area.
Don’t overlook remnant materials from countertop fabricators. These natural stone pieces are often sold at deep discounts and can create unique, high-end looks for fraction of retail prices.
| Material Type | Cost per Sq Ft | Installation Difficulty | Best For |
|---|---|---|---|
| Ceramic Subway Tile | $0.50 – $2.00 | Moderate | Classic designs |
| Peel and Stick | $1.00 – $4.00 | Easy | Renters, quick updates |
| Stone Remnants | $2.00 – $6.00 | Moderate to Hard | Luxury appearance |
| Painted Glass | $3.00 – $8.00 | Easy | Modern, seamless look |
Painted glass panels offer another budget-friendly option that creates seamless, modern looks. A 4×8 foot sheet costs around $150 and can cover most standard backsplash areas completely.
Money-Saving Installation Strategies
Installation costs can quickly double your project budget, but smart DIY strategies keep expenses minimal. I’ve developed techniques that help homeowners achieve professional results without professional prices.
Do your own demo and prep work. Removing existing backsplash and preparing walls saves $200-400 in labor costs. Take your time and protect surrounding areas properly.
Borrow or rent specialized tools instead of purchasing them. Tile saws, levels, and spacers can be rented for $30-50 per day. This approach saves hundreds compared to buying quality tools you’ll rarely use.
Buy materials during seasonal sales and clearance events. Home improvement stores typically discount tile inventory 30-50% during winter months. Planning your project around these sales maximizes your budget.
Purchase 10% extra material to account for cuts and potential breakage. This small investment prevents costly delays and reorders later in the project.
Take measurements multiple times and create detailed layout plans before starting. Mistakes during installation can waste materials and time, quickly pushing costs over budget.
Consider mixing expensive and budget materials strategically. Use premium tiles as accent pieces while filling larger areas with affordable options. This creates visual interest without overspending.
The skills you develop during your first budget backsplash project will serve you well in future renovations. Many homeowners discover they enjoy DIY work and tackle additional projects with confidence!
Creative Backsplash Designs Beyond Traditional Tiles
Thinking outside the box can lead to amazing backsplashes. Creative backsplash designs let you show off your style in unique ways. They can turn your kitchen into a reflection of your personality.
Exploring non-traditional materials can save money and be easier to install. These innovative solutions also offer customization that standard tiles can’t match.
Painted Glass and Acrylic Panels
Painted glass panels are a top choice for a modern look. They offer a seamless, continuous surface in any color. The installation is simple, and the result looks like high-end custom work.
Here’s why glass panels are great:
- Easy maintenance – just wipe clean with standard glass cleaner
- Heat and moisture resistant – perfect for areas behind stoves and sinks
- Unlimited color options – match any paint color or design scheme
- Professional appearance – creates a high-end, contemporary look
Acrylic panels offer even more design freedom. You can add printed patterns, textures, or custom photos. Homeowners have used family photos, landscapes, or abstract art as backsplashes. The results are breathtaking and unique.
Installing acrylic panels involves measuring, ordering custom cuts, and using adhesive or mounting hardware. Most panels have protective film that you remove after installation for a perfect finish.
Wallpaper and Vinyl Applications
Kitchen wallpaper has improved a lot lately! Modern vinyl is moisture-resistant, easy to clean, and comes in patterns that mimic expensive tiles or natural materials. These kitchen wall tile ideas can make your kitchen look like it has custom tilework.
The best wallpaper for backsplashes includes:
- Vinyl-coated papers – wipeable and moisture-resistant
- Peel-and-stick varieties – perfect for renters or temporary updates
- Textured designs – create depth and visual interest
- Tile-look patterns – achieve expensive looks at fraction of the cost
Installing wallpaper is simpler than tiling. Measure your space, cut the wallpaper, and apply it with the right adhesive or backing. Make sure to prepare the surface well and align it carefully.
What I love about these creative backsplash designs is the freedom they offer. You can achieve looks that standard materials can’t, from hand-painted murals to geometric patterns. These options fit almost any budget.
These unconventional approaches also offer flexibility for future changes. Unlike permanent tile, many of these options can be updated or replaced more easily when your style changes.
Complete DIY Installation Guide and Essential Tools
Let’s dive into the world of backsplash options! Installation might seem daunting, but with the right tools and plan, you can achieve great results. I’ve done this many times, and it’s amazing what you can accomplish.
For a successful tile backsplash diy project, preparation is key. Make sure you have everything you need before starting. I learned this the hard way, making multiple trips to the store during my project!
Must-Have Tools for Every Project Type
Here are the essential tools for a smooth backsplash installation tutorial. Start with measuring tools: a tape measure, level, and pencil. These are crucial for accuracy.
For cutting tiles, a manual tile cutter works well for most. But for harder materials, rent a wet saw. It’s worth it for clean cuts.
Don’t forget tile spacers, a notched trowel, and a rubber float for grouting. And always wear safety glasses and work gloves.
- Measuring tape and level
- Tile cutter or wet saw
- Notched trowel (1/4 inch for most tiles)
- Tile spacers and rubber float
- Bucket for mixing adhesive
- Clean sponges and buckets
Step-by-Step Installation Process
Now, let’s get started! Begin with wall preparation. Clean your walls and fix any imperfections.
Next, plan your layout. Find your center point and work outward. Do a dry run first to check the fit.
Apply adhesive in small sections. Use a notched trowel for even ridges. Press tiles firmly with a twist to ensure adhesion.
Remember to check your level frequently! It’s easier to adjust tiles as you go than to fix later. Use tile spacers for even gaps.
Wait 24 hours before grouting. Grout diagonally to cover all areas. Clean excess grout with a damp sponge.
Troubleshooting Common Installation Issues
DIY projects always come with challenges. Let’s tackle the most common issues and their solutions.
Uneven walls are a big challenge. Use extra adhesive in low spots. For major unevenness, use self-leveling compound first.
Outlet and switch cuts need patience and skill. Always turn off power first. Use a tile nipper for small adjustments and test-fit before applying adhesive.
Corner cuts can be tricky. Keep a fine file handy for minor adjustments. For larger gaps, caulk creates clean edges.
Adhesive problems often come from working too fast. Scrape off skinning adhesive and apply fresh. Work slowly for better results.
Grout haze makes tiles look cloudy. Clean it off while wet. Use a haze remover if needed after curing.
Every pro started as a beginner. Take your time, follow these steps, and ask for help if needed. You can do it, and the results will be worth it!
Conclusion
What an incredible journey we’ve shared exploring the best diy kitchen backsplash options for your home! I’m genuinely excited about the possibilities ahead for your kitchen transformation.
The kitchen backsplash trends 2025 we’ve covered offer something special for every homeowner. Whether you’re drawn to the simplicity of peel and stick tiles or the elegance of glass designs, each style brings its own magic to your space.
I love how accessible these projects have become. You don’t need professional experience to create something beautiful. The materials and techniques available today are designed with real families in mind. Your kitchen deserves to reflect your personality and support your daily life.
Remember, this isn’t just about updating surfaces. You’re creating a space where memories unfold every day. Start small if you feel nervous – maybe try a sample area first. Once you see how manageable these best diy kitchen backsplash projects really are, you’ll feel ready for bigger adventures.
Take your time choosing the perfect style. Trust your instincts about what feels right for your home. Your kitchen should bring you joy every time you walk into it. Here’s to creating spaces that truly feel like home!